JoshQ
-
Posts
838 -
Joined
-
Days Won
136
Content Type
Profiles
Articles
Events
Forums
Gallery
Downloads
Blogs
Status Updates posted by JoshQ
-
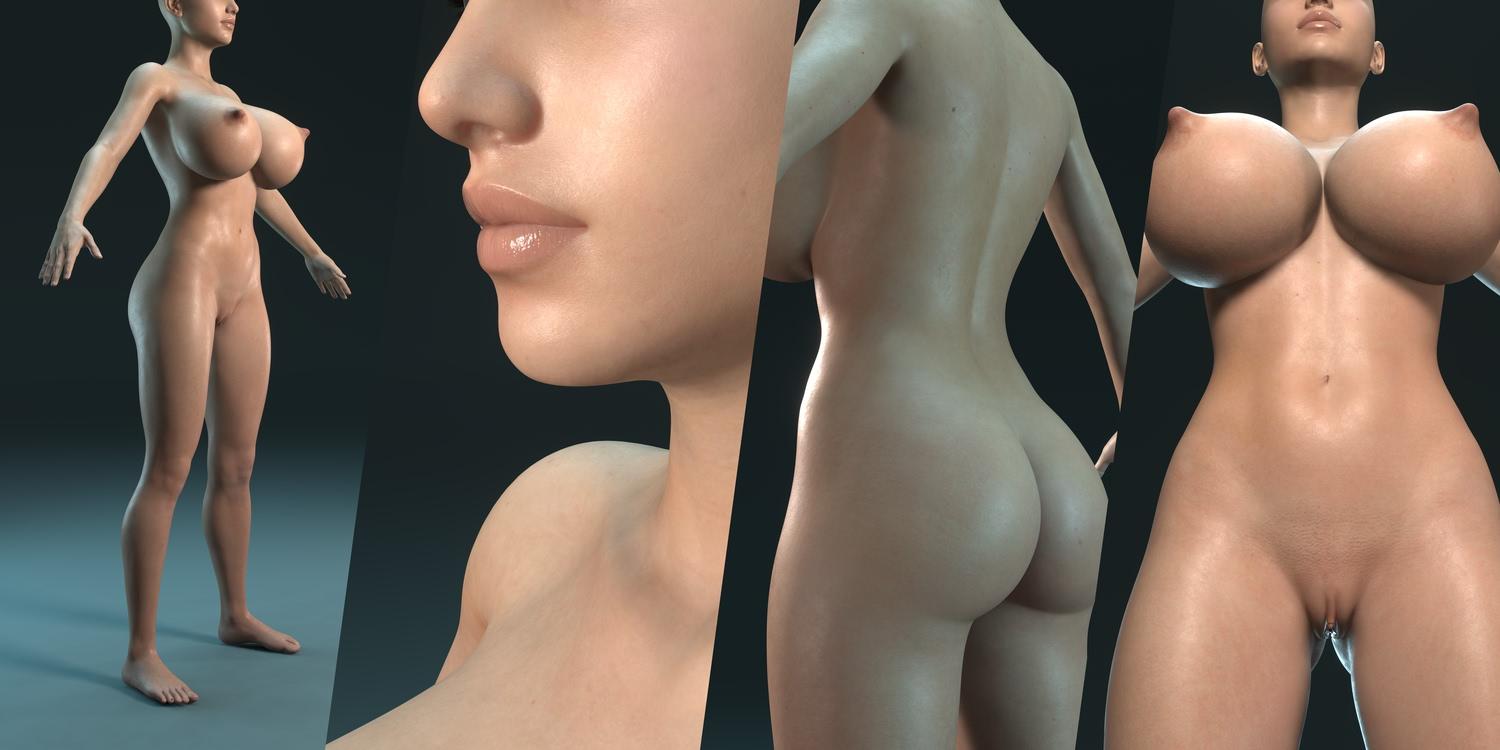
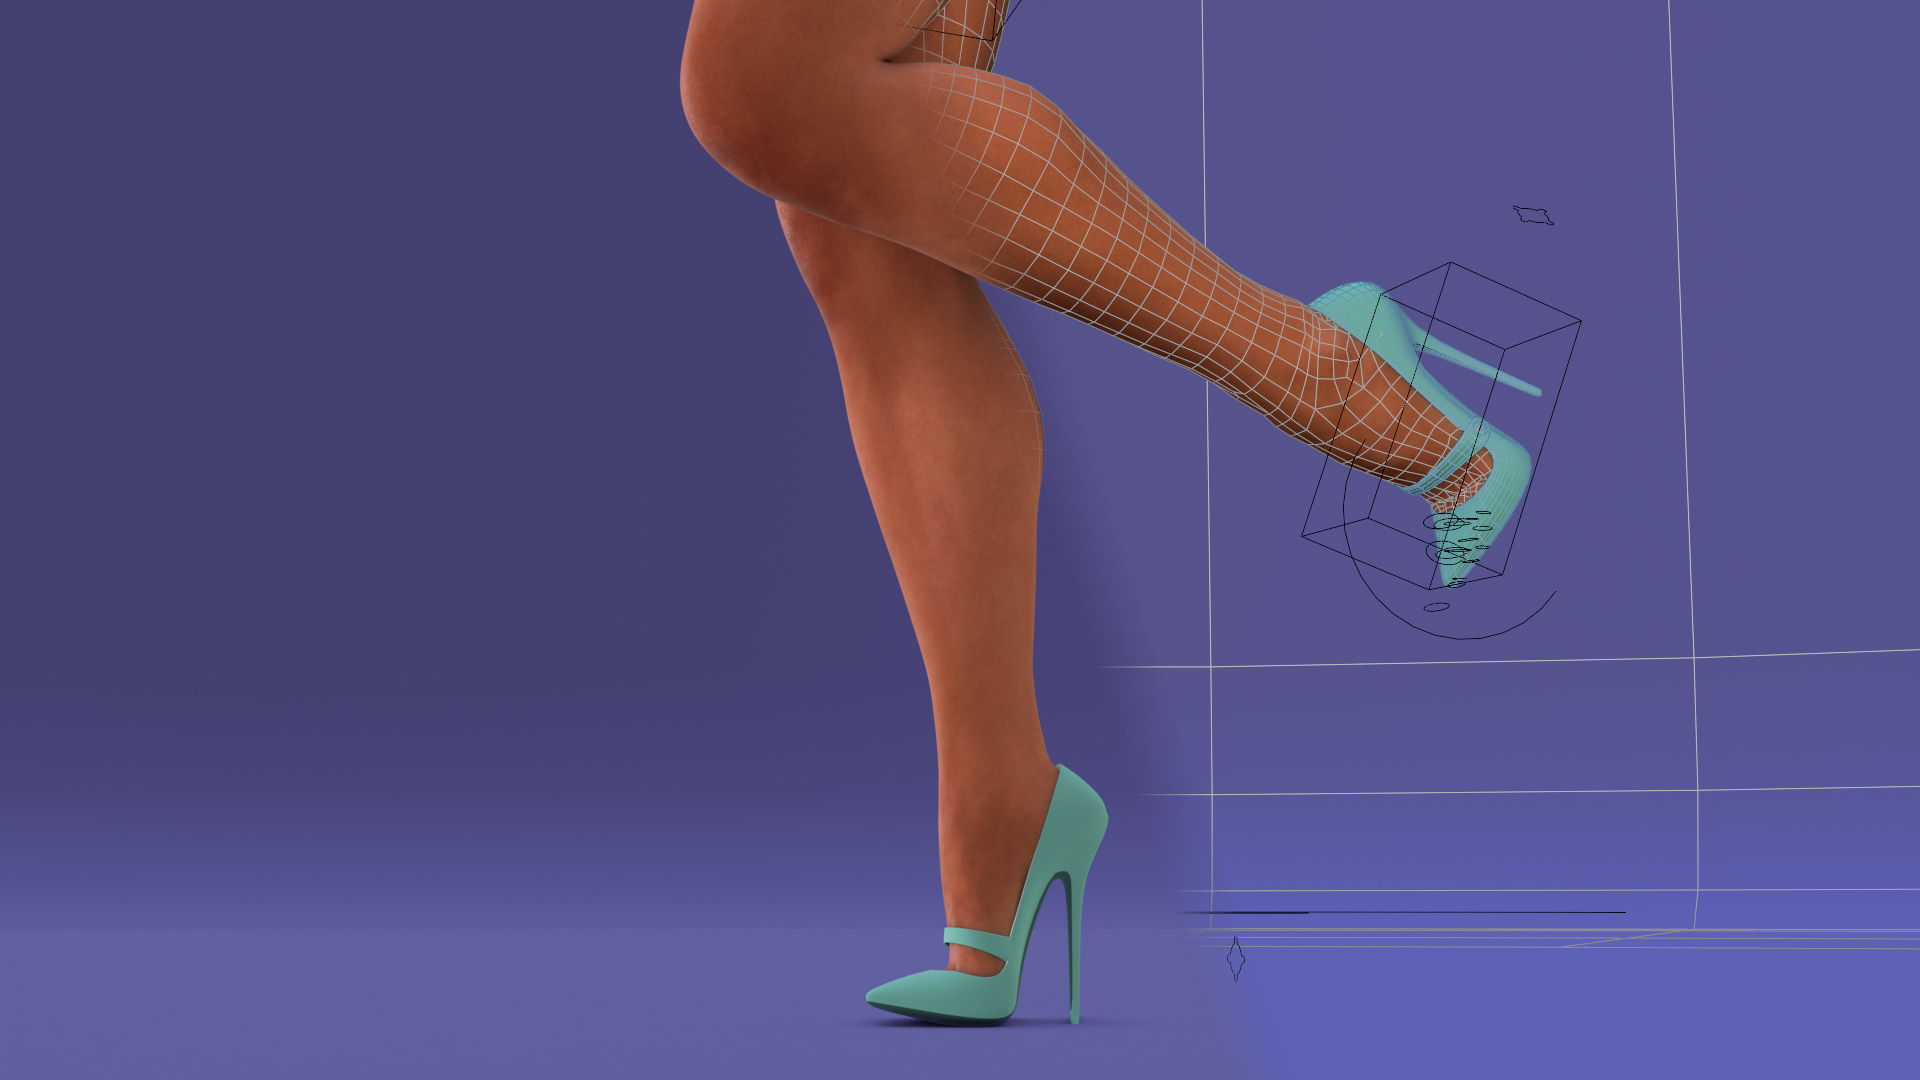
Made a skin shader for Blender because the usual material used for models (mostly from Daz) is slow to render on the potato I've for PC. You can download it on Smutbase.

-
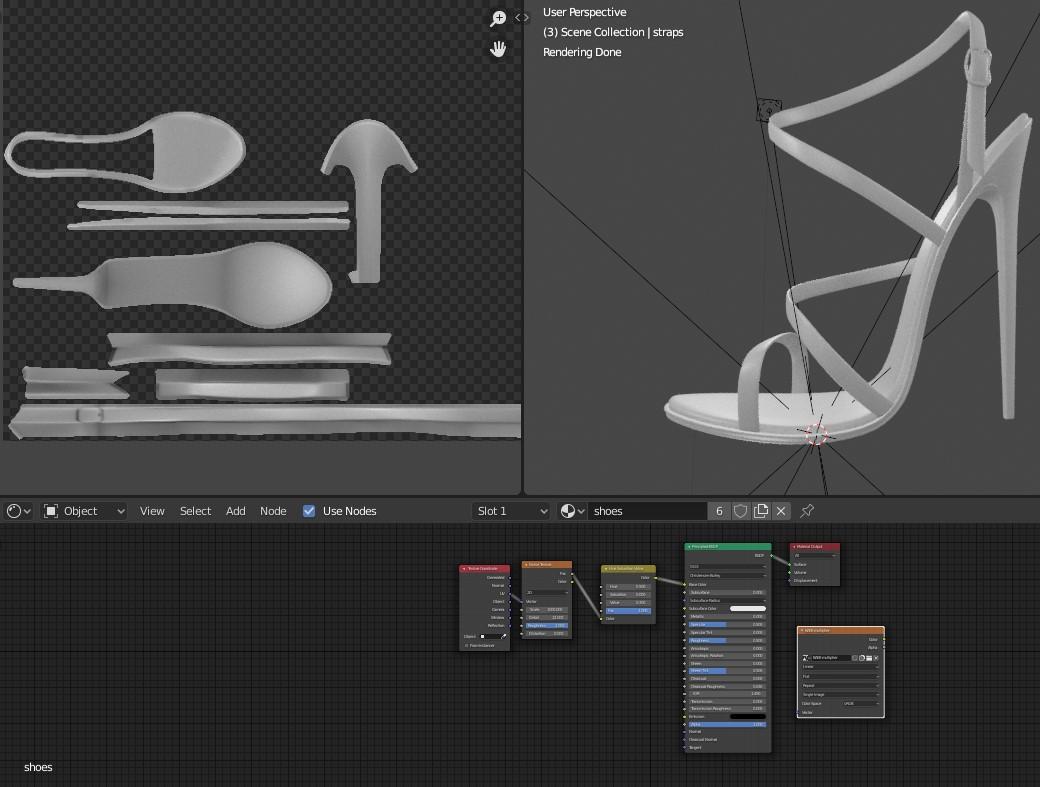
Uploaded a couple of shoe meshes to smutbase, they are intended for the models distributed there but if you now your way around ‘non-destructive modeling’ adapting them to another game/engine should be “easier” than their TS3 equivalent (sans textures).
I’m not leaving the sims modding scene but I had to confess that watching my creations in “high-res” is very refreshing and I will look into uploading some more.

-
Sorry for spamming, the good news are this was my last upload of 2020. The bad, not good, awful news are I still have lots, lots and lots of stuff to share for next year, after I take a breath for a moth or two.
-
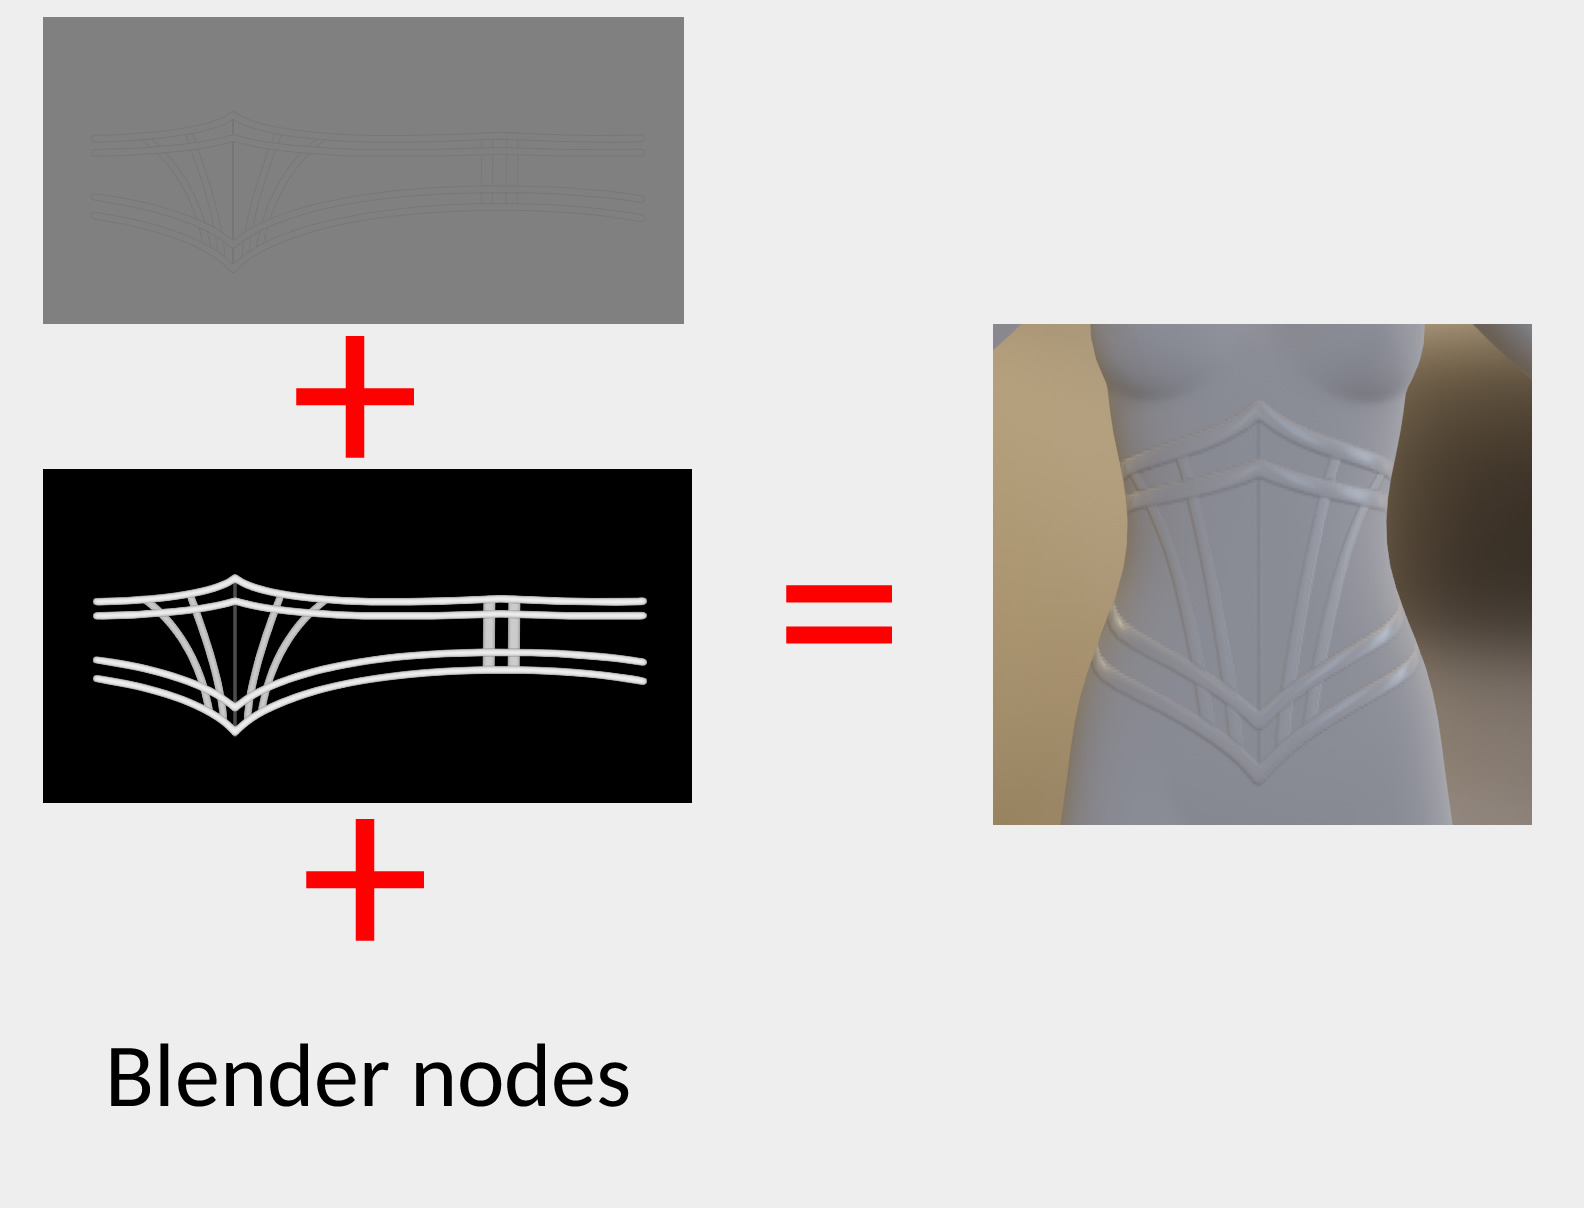
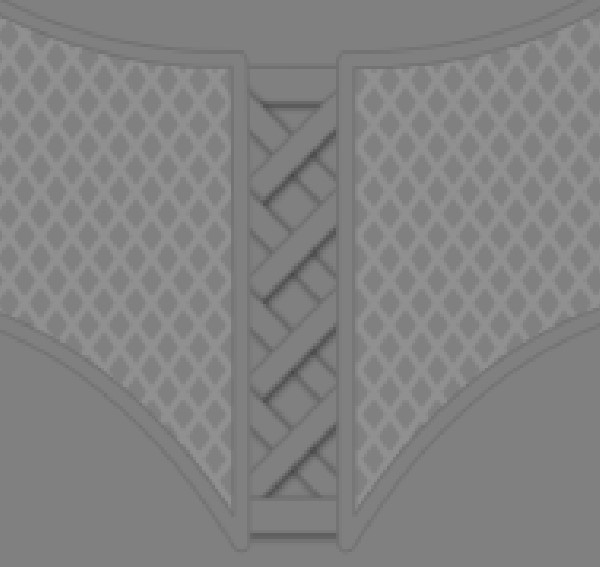
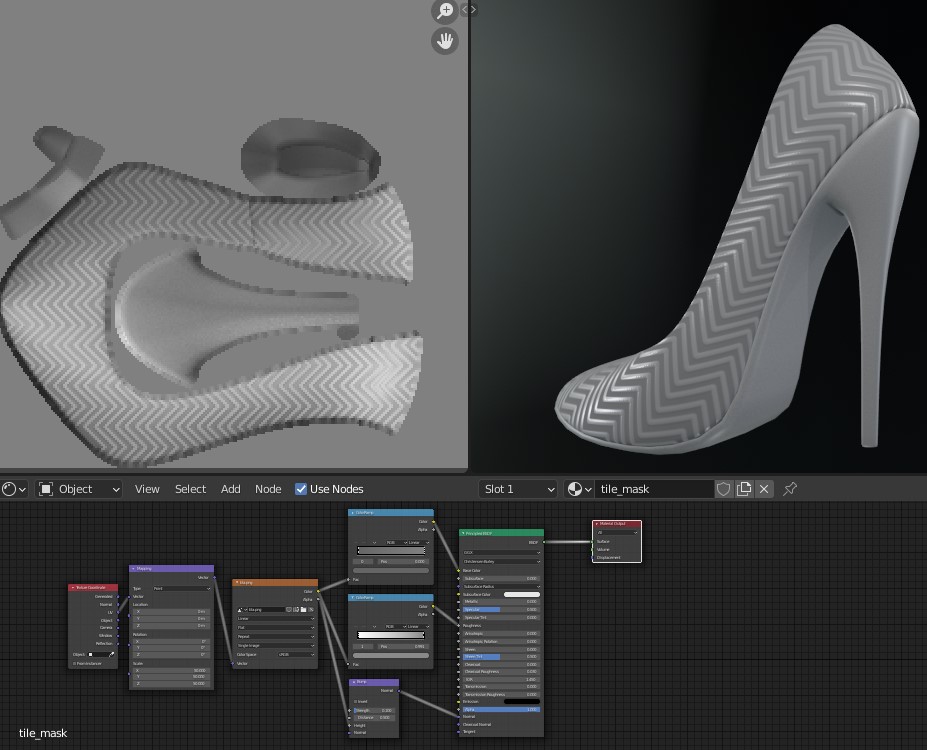
So the very basic textures I’m baking on blender (mostly for garments) have three components:
The ‘color’ which has all elements (straps, borders, laces, etc) delineated with low contrast lines
The ‘roughness’ in which you control how reflective each element is: black is like a mirror and white is the opposite
And the last one is the ‘normal’ that allows you to fake depth, black elements wont “protrude” while white and grays will. This image is connected to the height of a ‘bump’ node and both ‘strength’ and ‘distance’ are below .2
NOTE: Both roughness and normal can be controlled further with a ‘color ramp’ node
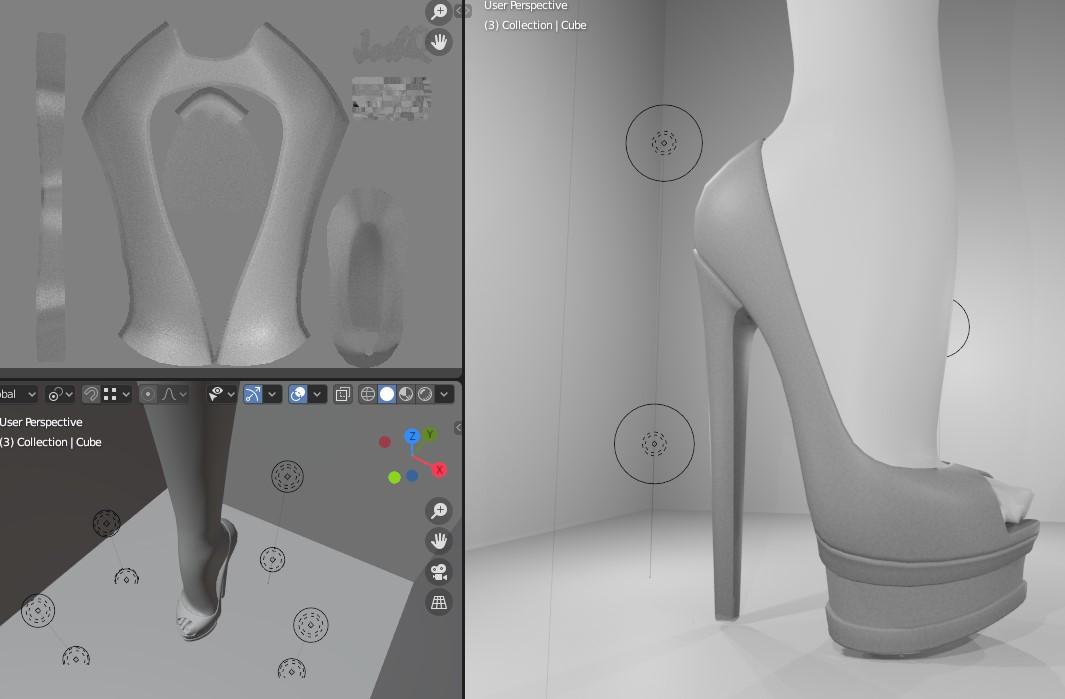
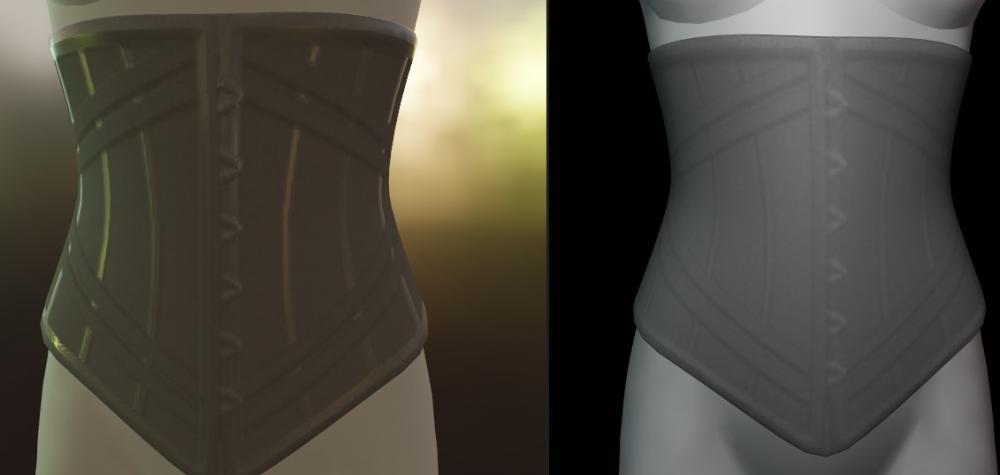
Combine these components with some lamps and/or an hdri image and you get some basic volume, shadows and highlights baked into the texture (plus a normalmap). As I said before most of it will be lost when converted to a 1024x1024 DDS image but what remains looks better than my several attempts of adding detail by hand.
-
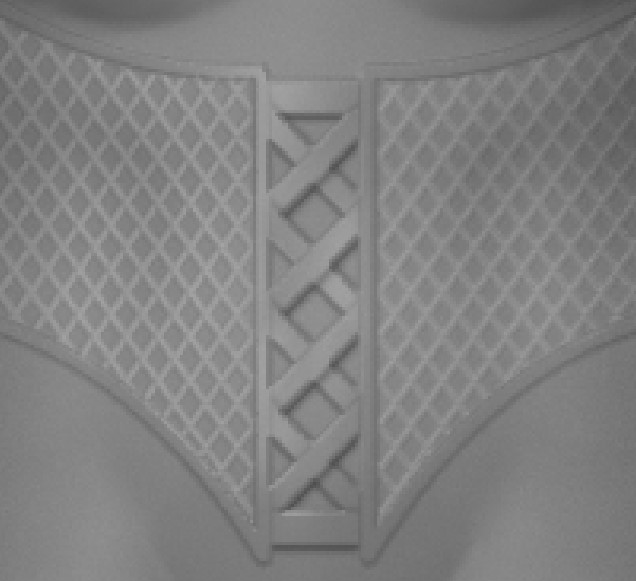
To be totally honest with you most of the detail showed here disappears when you bake it into a 1024x1024 texture but even then what’s left is good enough
-
I’ll eventually write a tutorial or at the very least some loose notes to get this result:

-
Many moons ago I mentioned ‘Bforartists’ a fork of Blender that centers in ease of use. When I found it Blender 2.79 was the latest version which I barely was able to use so Bforartist looked like a good alternative, but then I looked into the developer notes and goals for Blender 2.8 (which I believe was in early alpha back then) and decided to wait for it instead.
Recently I checked it once more and now the project has up to date builds based in Blender’s latest (2.91 alpha) and a more robust faq/guide section. If you hate memorizing keyboard shortcuts you might feel at home with Bfoarists because every function has a colorful icon and/or entry on the menu and you can still configure the workspace, install addons, etc.

I’m already accustomed to Blender’s new interface and shortcuts but if you’re the complete opposite maybe give Bforartists a try.
-
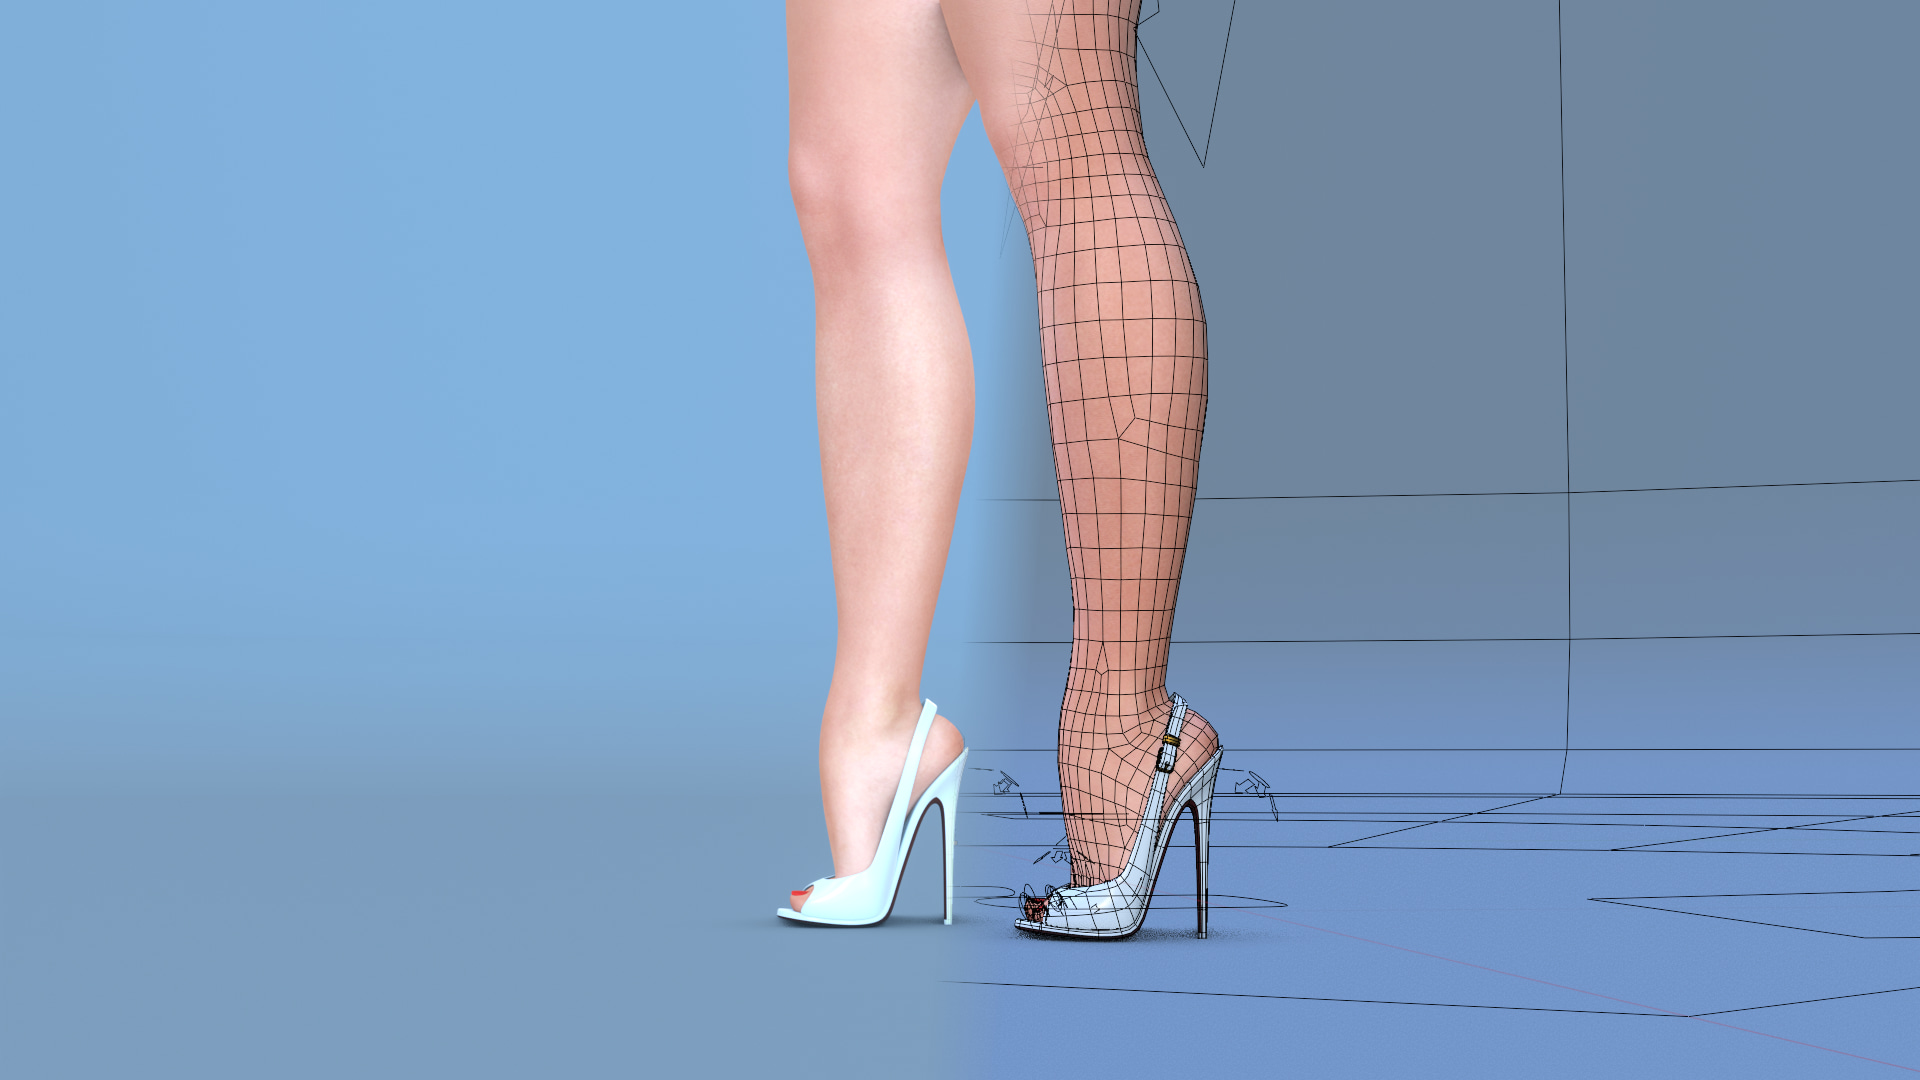
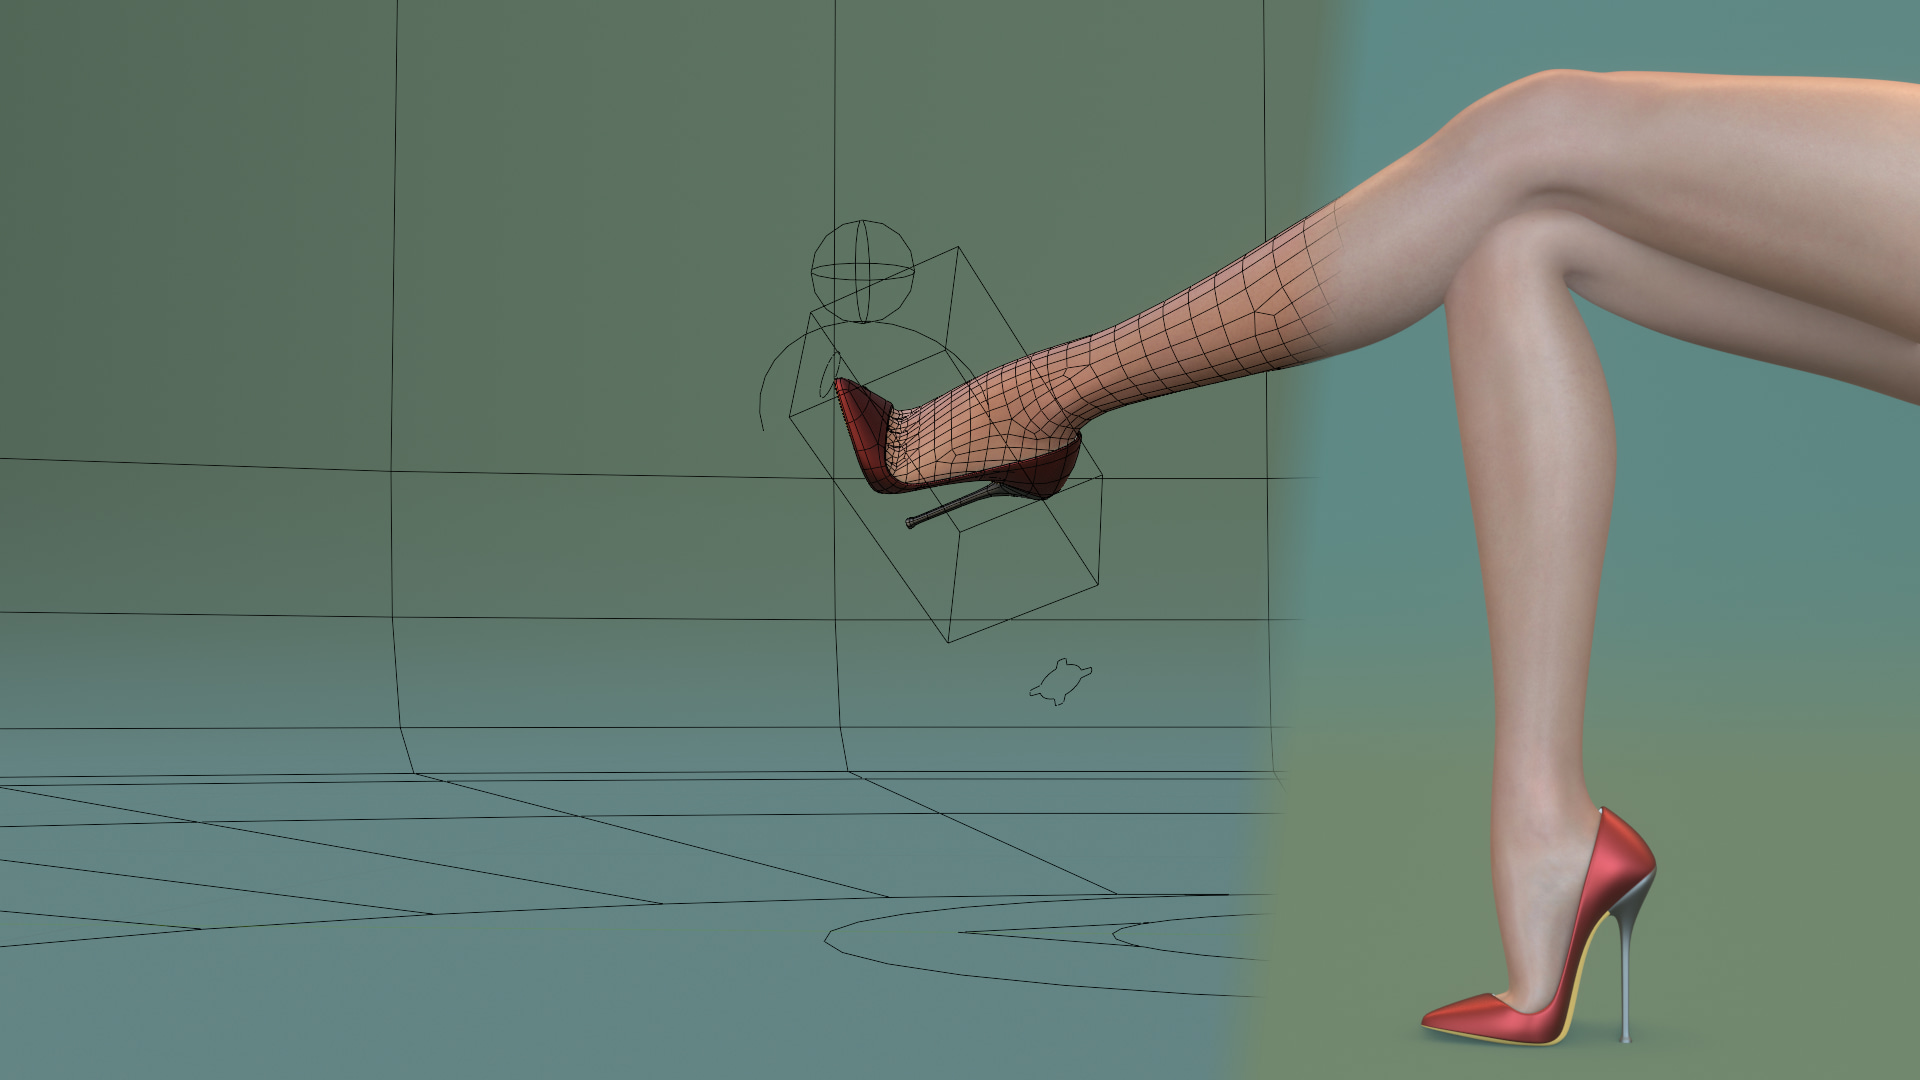
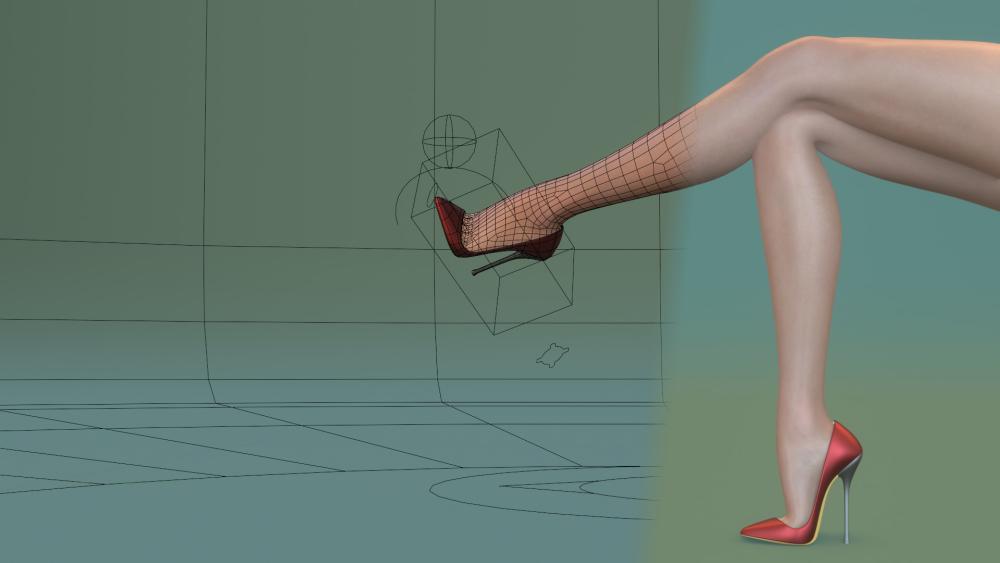
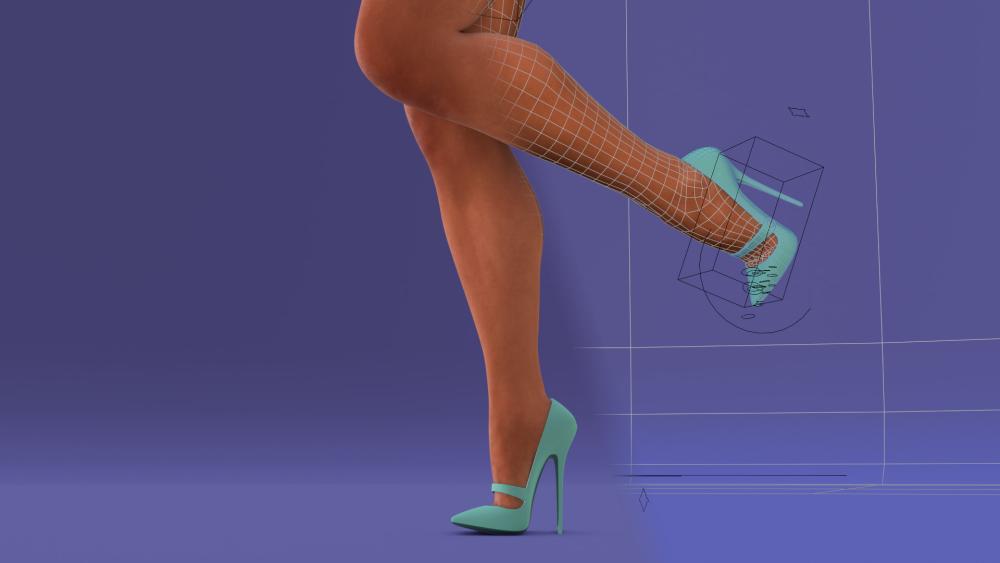
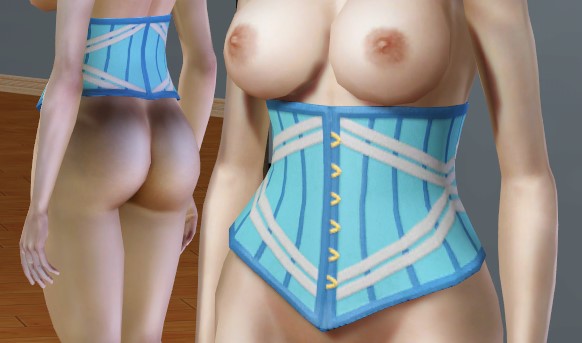
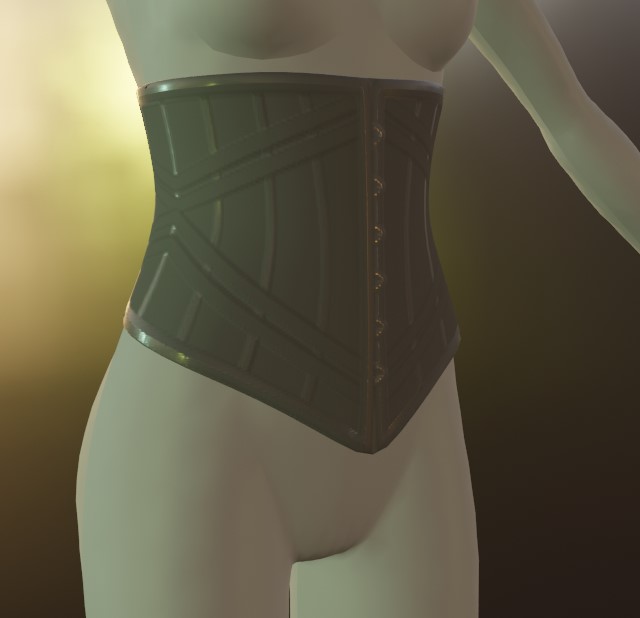
From this:
To this:
“Simple Lingerie” accessories (and maybe stockings) are going to become a little less simple... and that's a good thing!
-
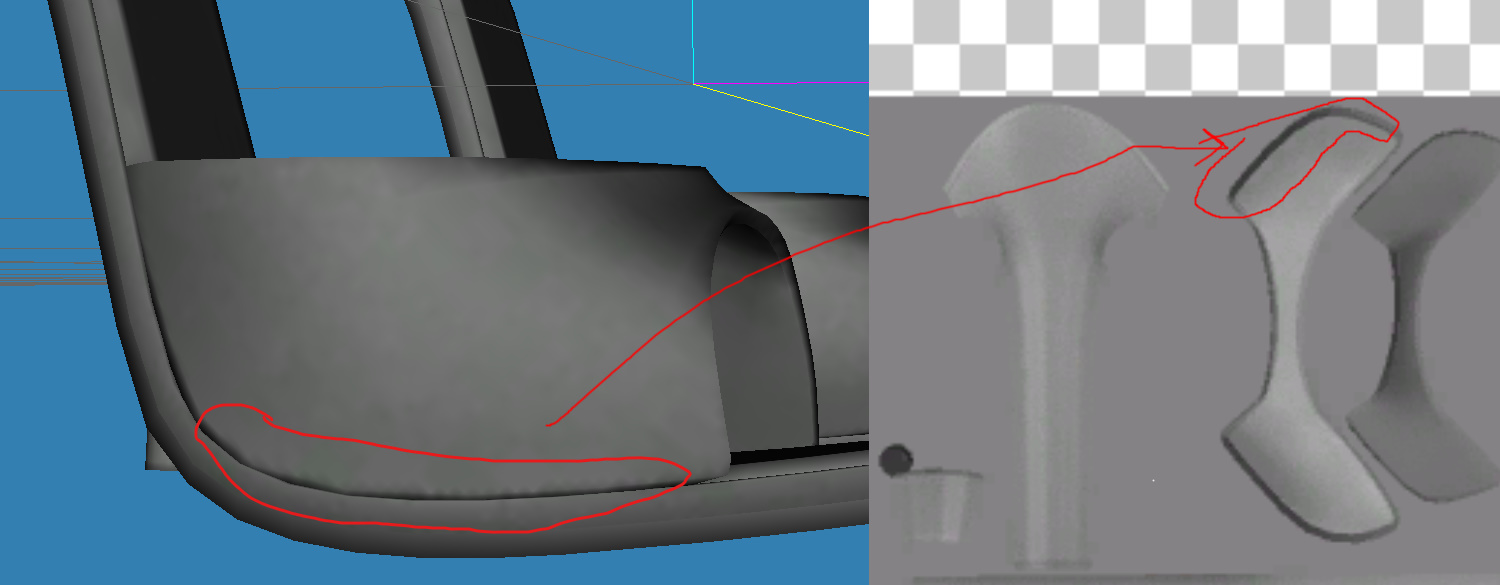
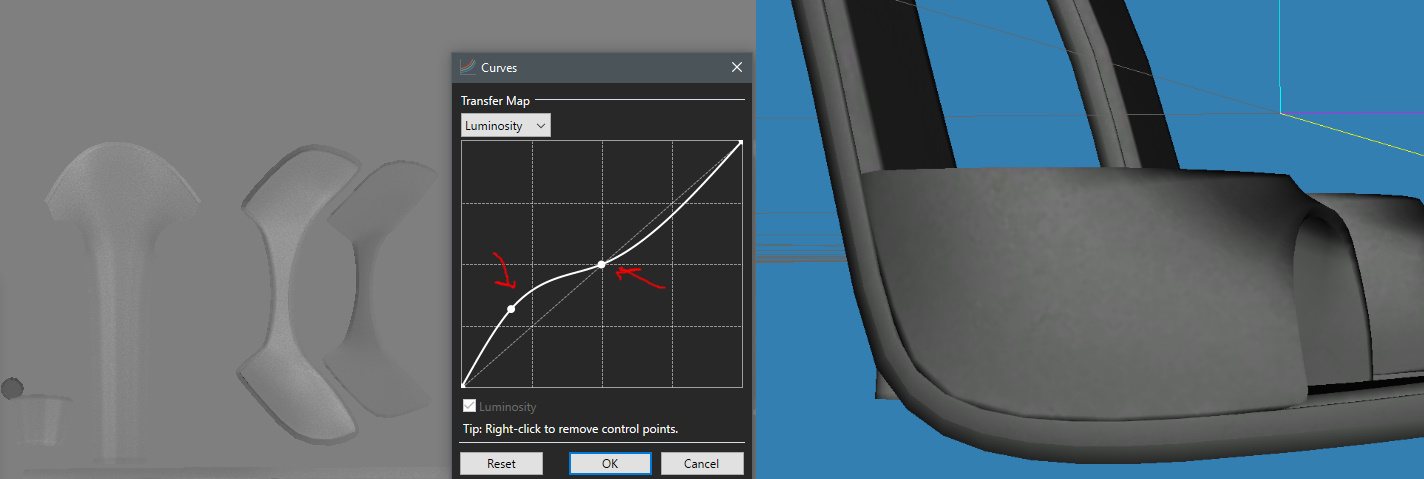
Quick and dirty trick to reduce contrast on textures for Sims 3
Why reduce contrast? Because DDS compression (DXT1 – DXT3 – DXT5) absolutely sucks when compressing pixels that go from near black / white to neutral gray:

It might look like no big deal on a 3D editor but once in the game these artifacts and other DDS-attributed defects (like ringing) can be easy to detect.
So besides modifying the lighting, material, UV size and baking settings inside Blender you can easily just use an image editor that allows modifying levels using curves (in my case PaintNet). Just be careful because, as you can see below, reducing contrast also washes away detail, a small adjustment is enough:

-
I was looking into making some procedural textures using nodes, but every tutorial ends in a monstrosity like this one (and the image just shows half of it):
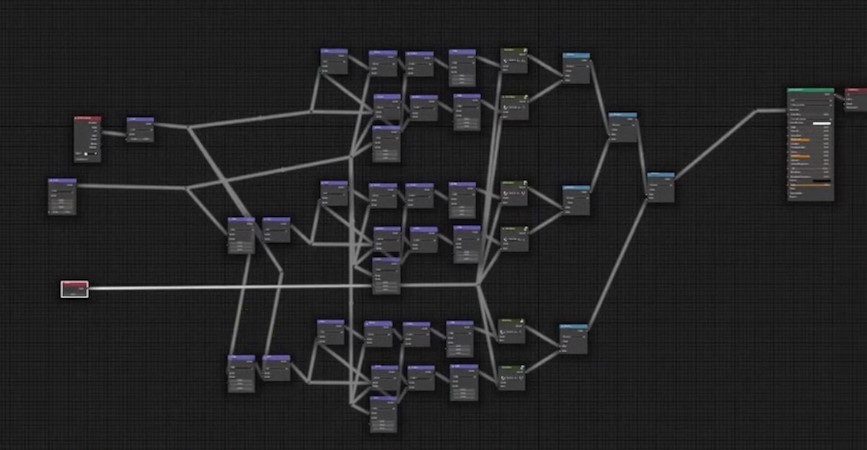
Which isn’t necessarily a bad thing because of the power of making something completely modifiable to the smallest detail. But then I remembered “Blender can also use DIY patterns” and then made this in less than 5 minutes:

Obviously is doesn’t generate as much detail as a procedural texture, but for the stuff I make you’ll hardly notice any difference.
TL;DR: sometimes being lazy does pay
-
Friendly reminders:
- Every single piece of CC made under my name is free, forever. Avoid scams
- I only “exist” in two places: Loverslab and NSFWmods. No twitter, no facebook, no discord, no tumblr, etc
- No rules, no tou, no nonsense. Like my stuff? Download it. Want to modify it or even port it to other engine? Don’t even ask me, do whatever you want
-

That is what makes you so awesome!
One of the reason I click Like to every mod and tutorial/guide support you submit on either site. NSFWmods is lucky to have such a person as you on our site. I am confident that the admin and other moderators will agree.
Keep up the great work and stay true to yourself.
-
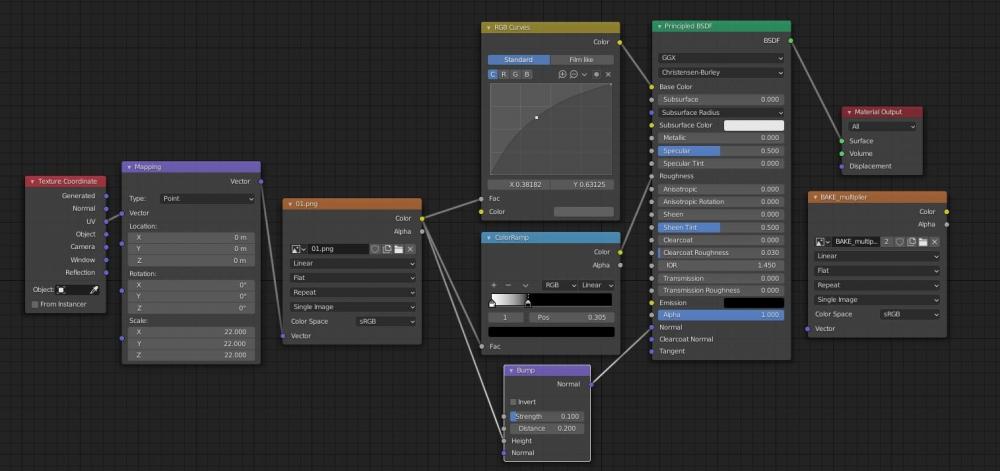
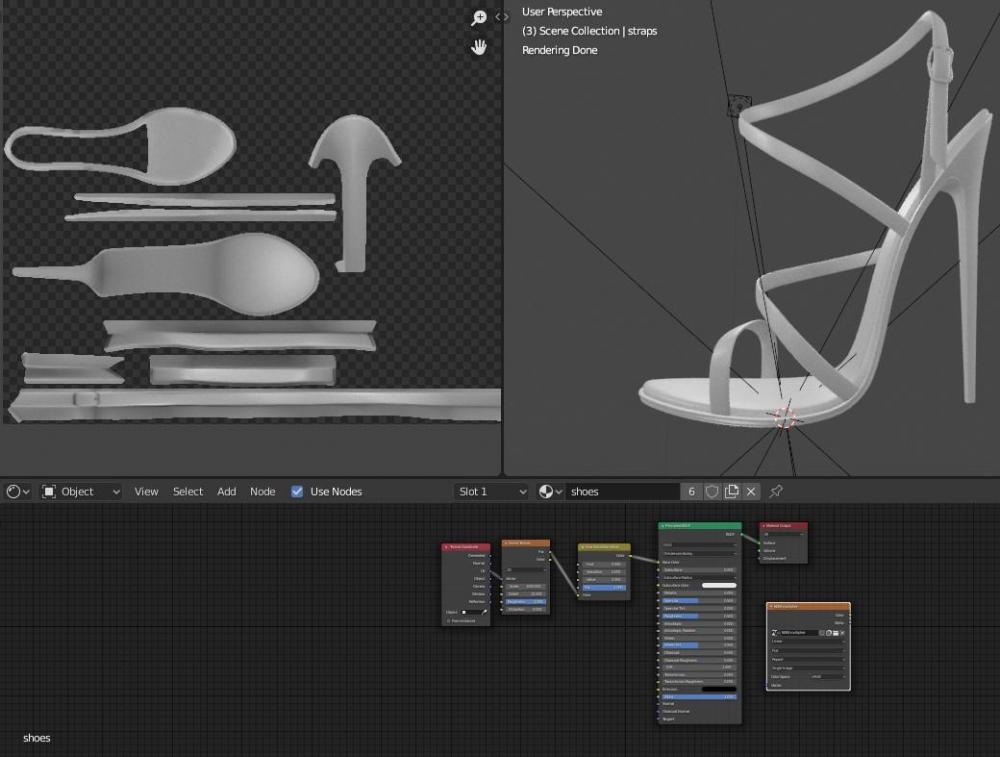
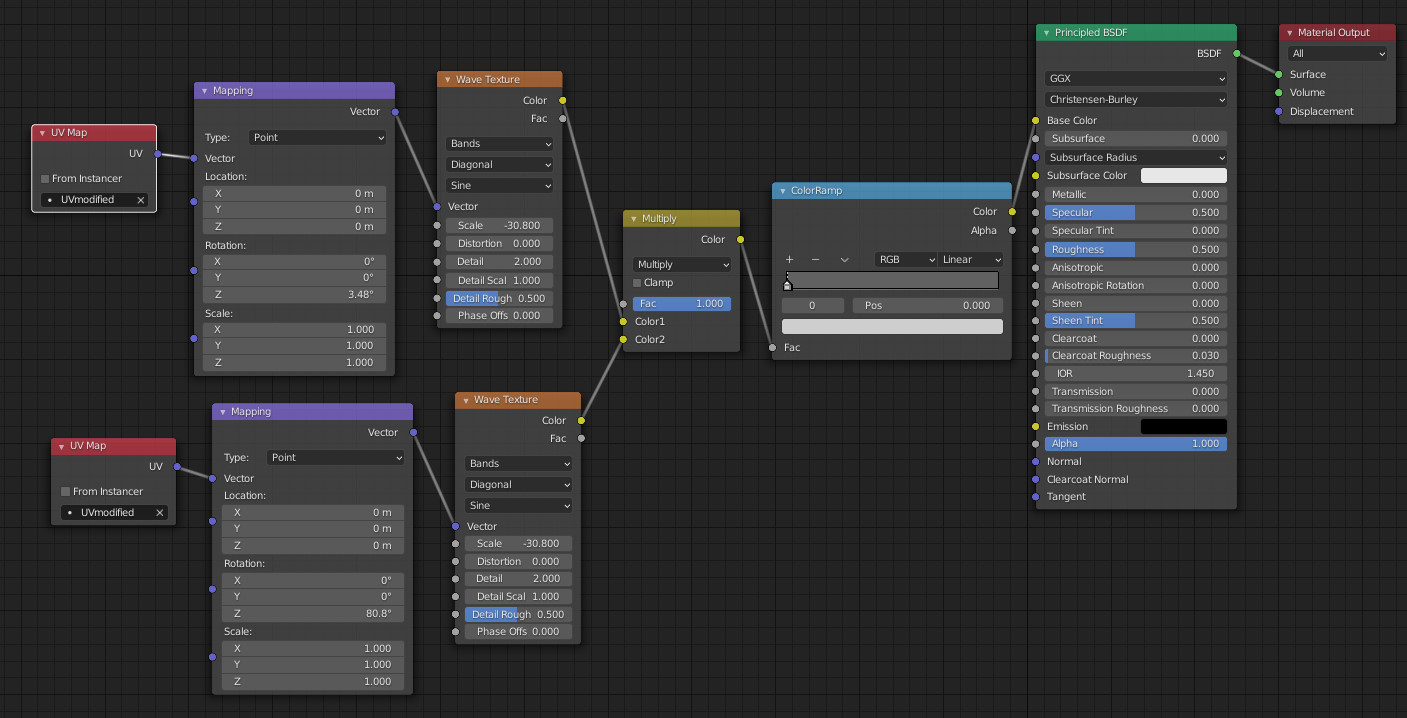
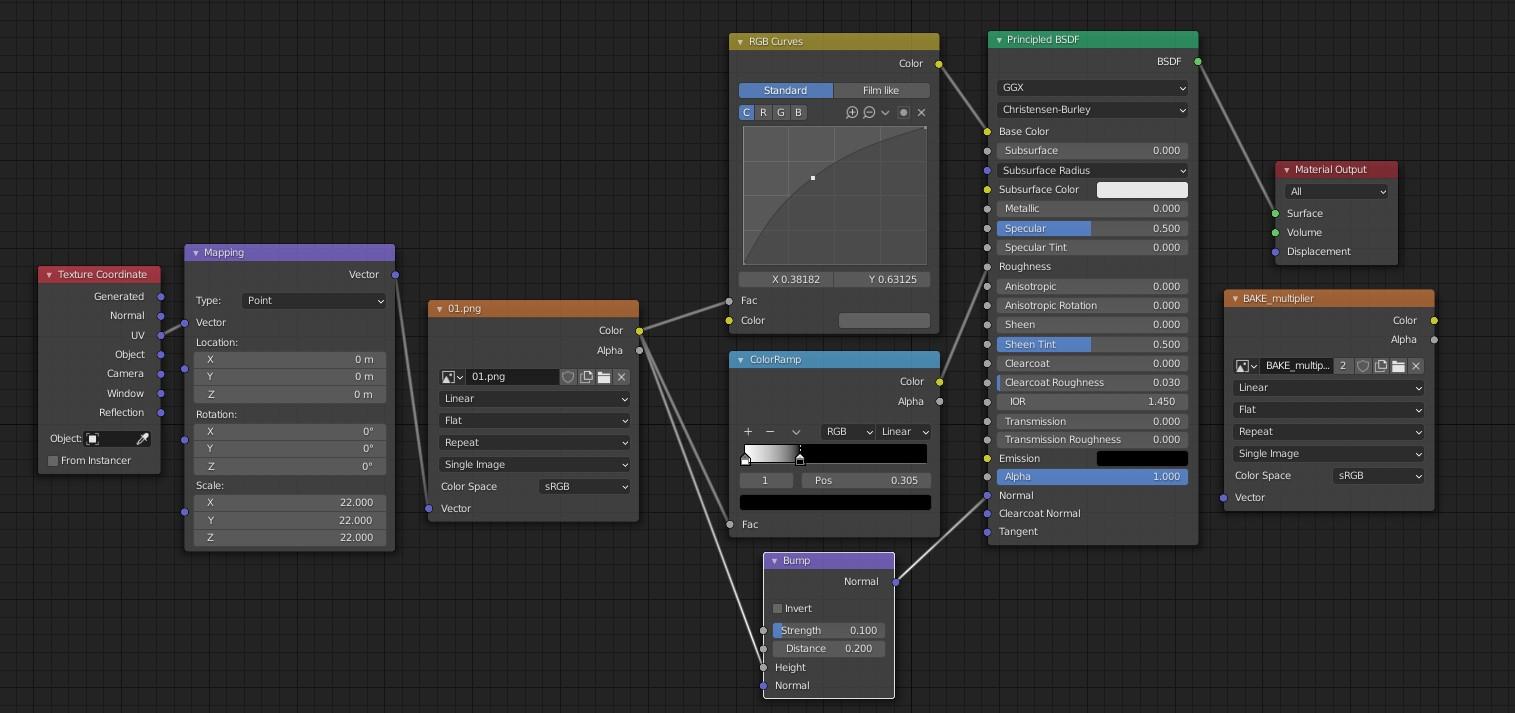
This is the node setup for Viper, nothing spectacular although it worked pretty well for making several textures from a single 512x512 tile.
Some notes:
- The ‘RGB Curves’ node allows two things: changing the image to “neutral gray” using the ‘color’ slot and then modifying the contrast using the curve, more or less like photoshop does
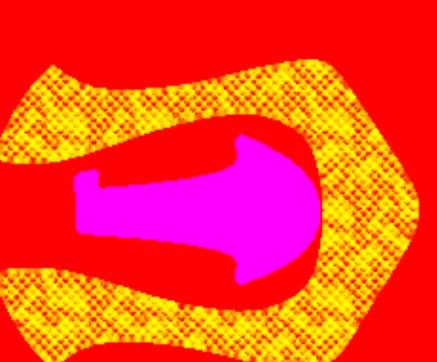
- The ‘ColorRamp’ node, when connected to the ‘roughness’ was used to determine which sections of the texture where shiny or opaque, also I used it for the mask (not showed here) because you can add your own colors in this case I use it to change the dark scales to red and the bright to yellow:
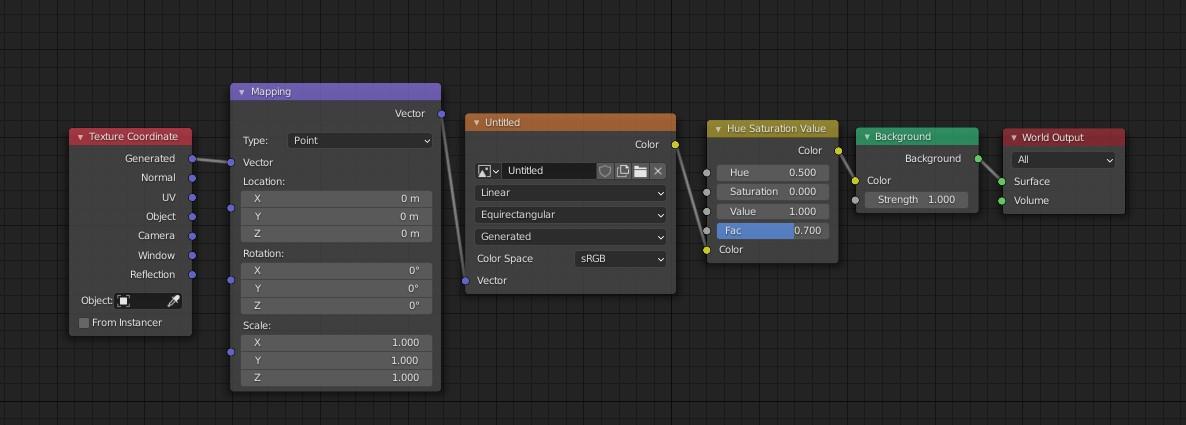
This is the node setup for the environment texture (aka hdri):

- I used the ‘Hue Saturation’ node to make the hdri “gray” by moving the saturation to 0, this is because an hdri not only provides light information but also color and for this game your textures must be grayish
-
And finally I also reduced the
‘factor’* because initially the resulting texture was a little bright, ‘dds dxt1/dxt3‘ compression introduces artifacts when dealing with high contrast and small details
*what needs to be reduced is the ‘strength’ on the ‘background’ node
-
Simple masks can be done a lot quicker (and precise) using Blender too.
You can do the same for the alpha (white over black canvas) and save it separately, then you can use DXTBmp, GIMP, Photoshop, etc. to join them and create a 4 channel mask.
-
Besides some crashes (don’t forget to save frequently!) I’m liking Blender 2.9 so far although I still need to check add-on compatibility.
-
Repost(?): some youtube channels with tutorials for Blender
- Josh Gambrell for hard surface modeling and tips to clean topology
- Cédric Lepiller for non-destructive modeling (even if he uses a paid addon of his own you can learn the fundamentals from him)
- CG Matter has a lot of different videos but I find the ones that shows how to use nodes, including a full course, very helpful
- Jayanam is one of the few that centers in making low-poly game assets which are the best to start learning, also develops free addons
- Bonus: This tutorial by CG Boost is still one of the best there is for newbies and covers almost all steps from modeling to rendering.
Of course there are hundreds if not thousands more, these are the ones that helped me the most. Also friendly reminder: you can use Cmar’s Meshtoolkit to convert an .obj to either .geom or .wso and back, you can also use Milkshape 3D (after installing some plugins) although it can be slow when exporting .objs.
-
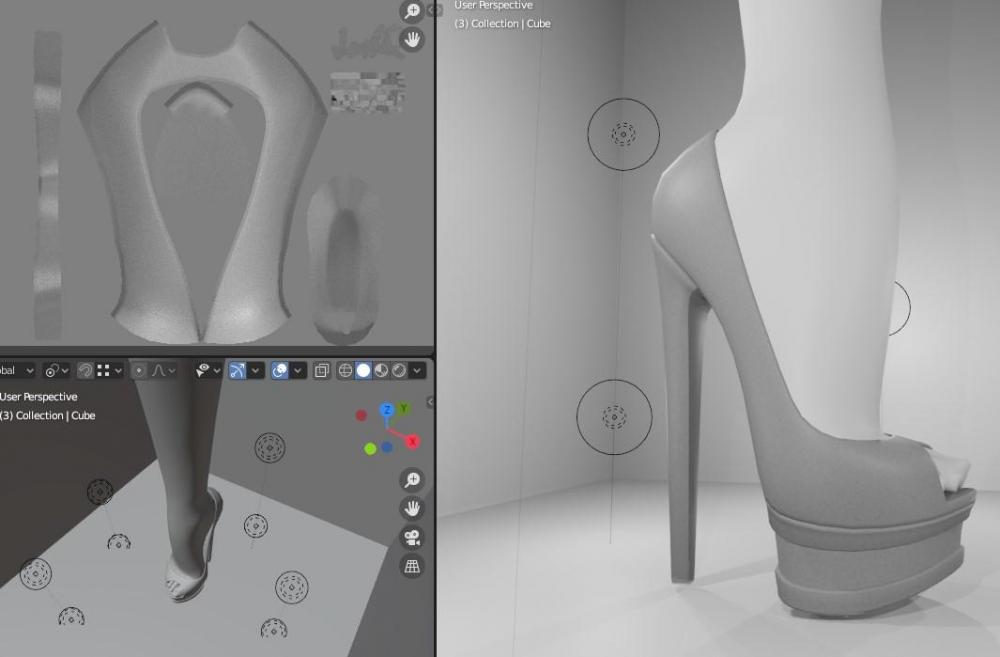
Despite the graininess (thanks to the minuscule area I’ve to work with) the difference between this and my old "textures" is discernible even at normal camera distance, at full zoom you will see some pixelation but by then you’re not playing anymore

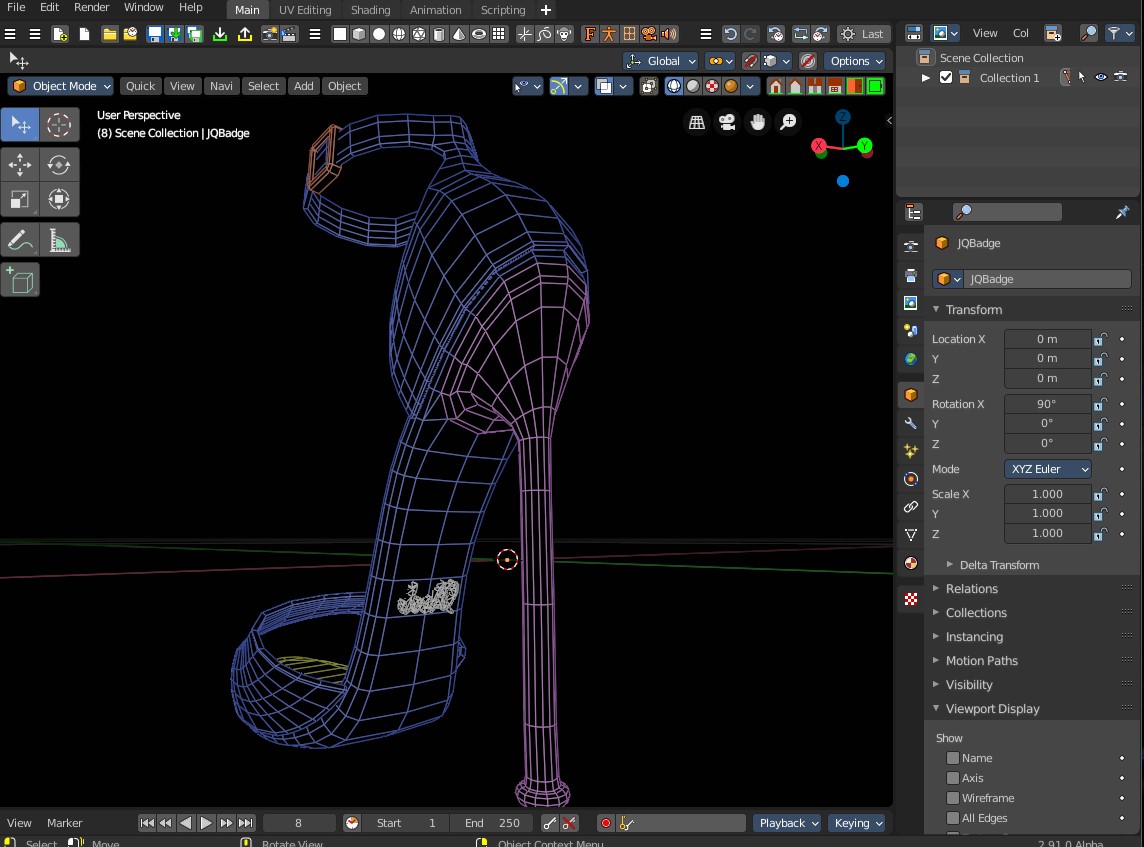
Will I ‘re-texture’ all my past releases? As I said before meshes require a clean UV map for the baking to give the best results, some models already have it but the majority would require some work. I will choose the “easiest” projects to retexture but of course I also have several other projects on queue (see pic) so yeah… it’s going to be a slow process moving forward.
Anyway, barring a worldwide disaster *nocks on wood* I’ll have something to share next week.
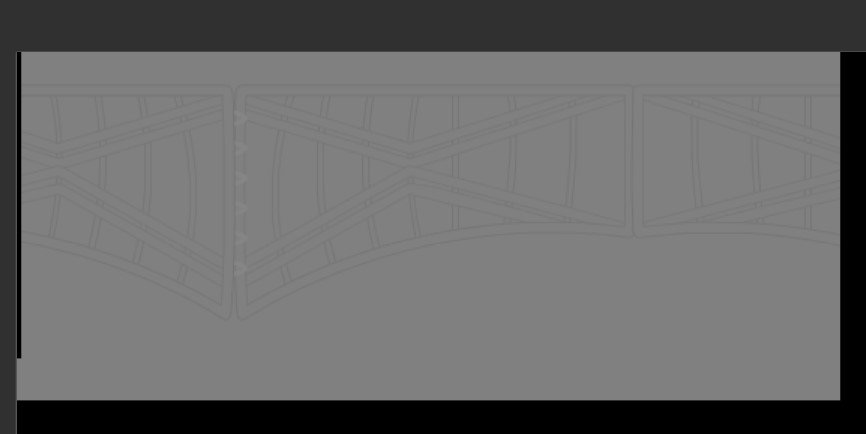
-
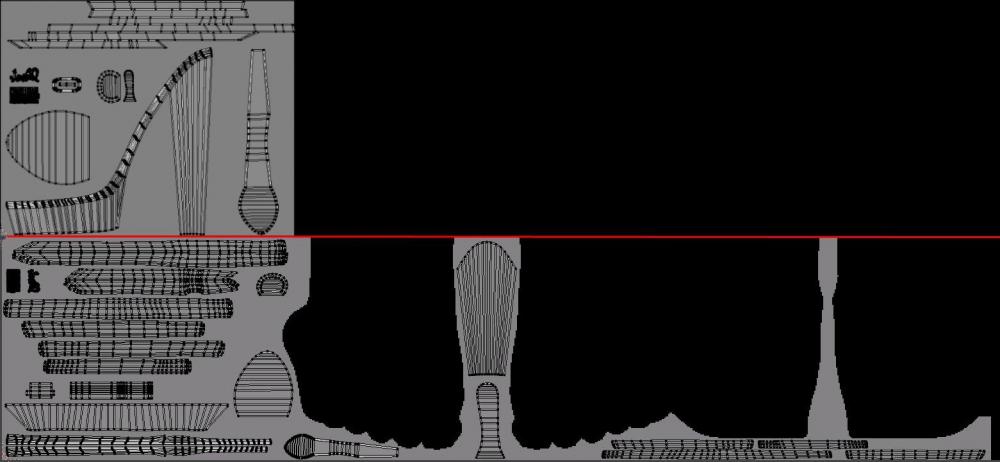
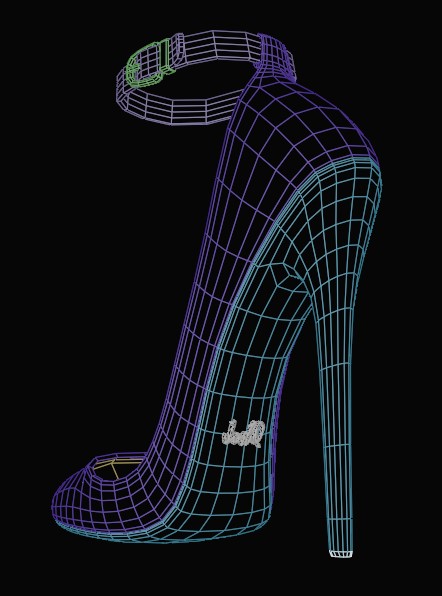
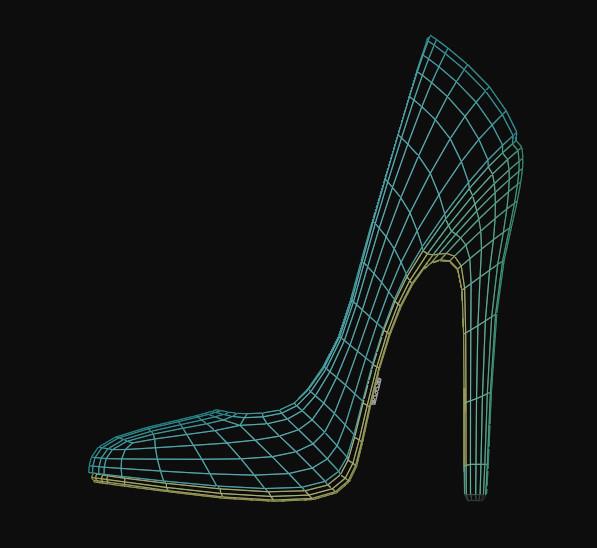
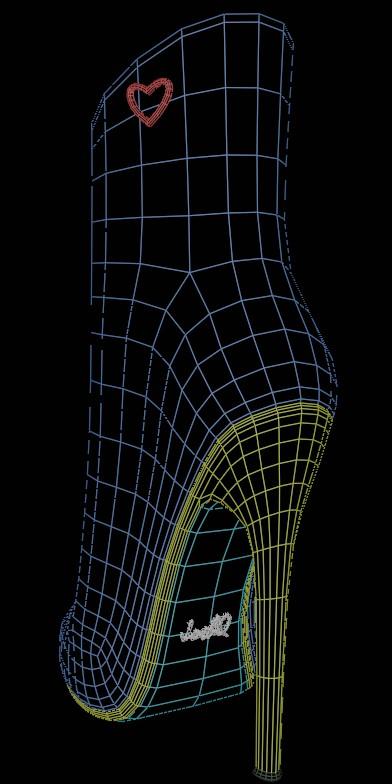
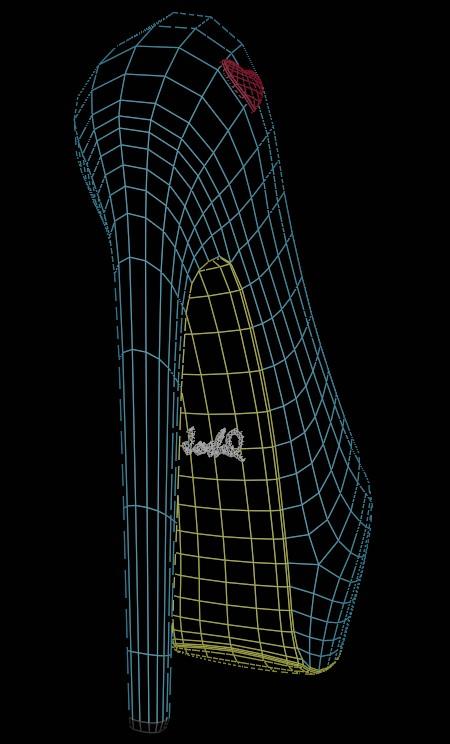
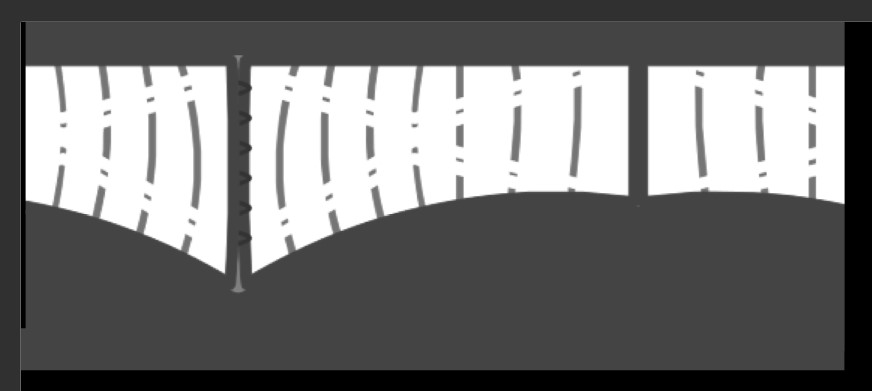
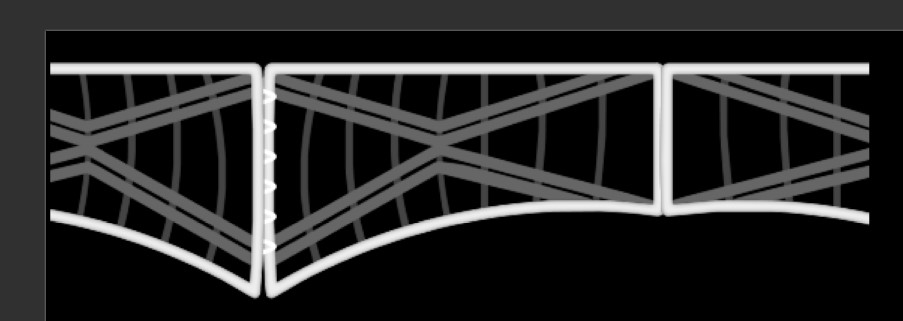
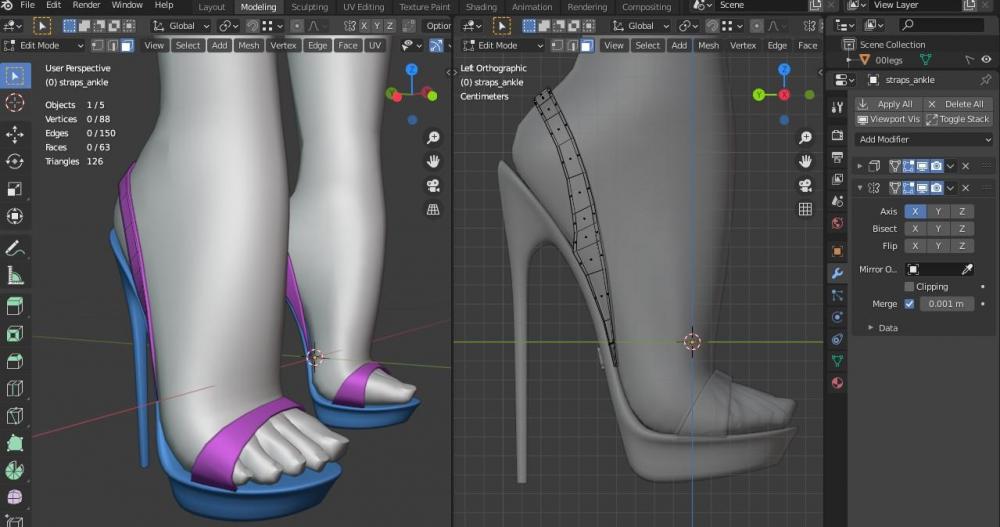
Above the red line: a simple uv map where exterior and interior faces share the same space, easy to make and it works with CAS patterns but isn’t suitable for baking in Blender.
Below: a more detailed map where every face is represented and, as you can see, takes a lot more space (and time to make). Both are from the same mesh and the latter is how I’m going to unwrap my UVs from now in the pursue of better textures.
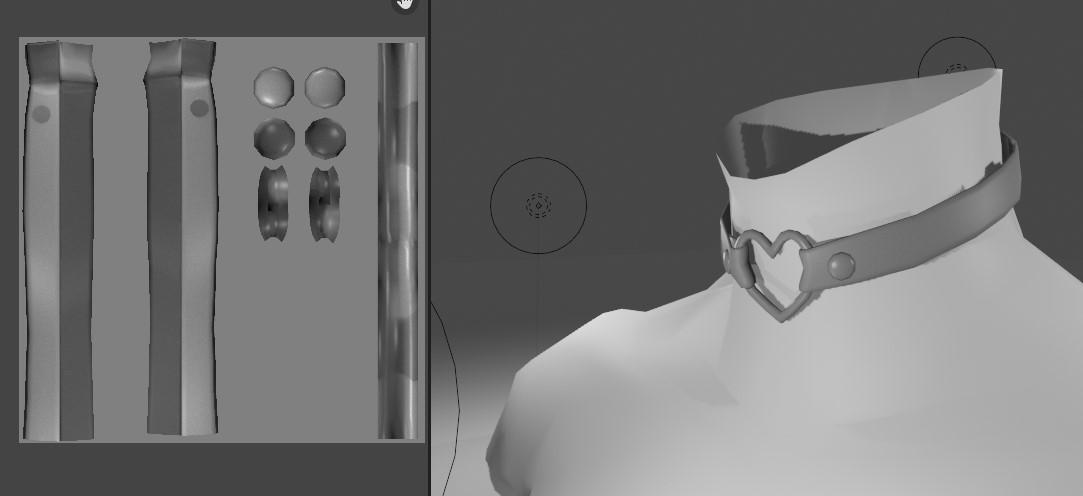
Another type of CC that benefits from this approach are 3D accessories (necklaces, belts, nails, etc). Now, this is “tricky” because as you might know the game’s engine reduces the texture quality the more accessories you put on your sim, but unlike shoes I can use the whole 1024x1024 area to counter it (more or less).
tl;dr: at the very least shoes and accessories are going to get a bump in detail from its textures, and because it takes more than double the time to make I’m back to 1-2 releases per month.
-
Quick tip to accelerate baking times in Blender 2.83
Go to ‘Tiles’ and change the value to the resolution you’re baking into, in my particular case 2048x2048 (if you want to go higher be sure your GPU has enough VRAM, mine has 2GB).
Optional: activate ‘Adaptive sampling’ and change the threshold to ’0.1’ this will generate some faint noise, how visible or desirable this is will depend on your particular case.
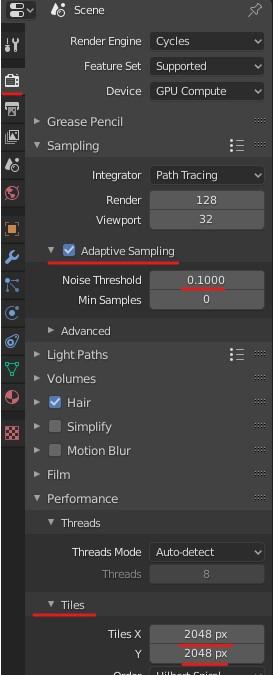
Using both options my times went from 2-3 minutes per bake to less than 1, it sounds insignificant but because I’m doing several tests at a time any reduction helps, of course better hardware might get quicker results.
What about reducing rendering samples? In my tests I noticed a reduction in image quality so I’m leaving the samples alone.
-
One thing I admit my shoes are lacking is in the texture department, literally I use one shade of gray and even after increasing the polycount the way illumination works in The Sims 3 makes my CC look “flat”, or at least that’s how I perceive it (patterns help but not enough).
In the past I avoided generating textures for one main reason: The texture space for shoes is extremely small so details get lost or blurred at best and I don’t want to make 2k/4k textures to compensate nor make them by hand.
So I’ve been experimenting trying to find a way to add just the right amount of detail to textures without resulting in a pixelated mess, with some luck you’ll see the results in a month or two.